Hatching in a laser marking machine outlines and fills the marking patterns on a solid-shaped object. In this, we can set its parameters to get the desired hatching within the body. Simultaneously, it helps with fast and accurate continuous marking for the different objects. Hatching does fast, contrasted, clear, and deep laser marking and engraving over the object placed underneath the laser beam.
What is Hatch in EZCAD software?
It is a main function in EZCAD software that helps to fill the different line patterns (horizontal, vertical). It includes linear and angled lines during the laser marking and engraving inside the solid objects. It is followed by Hatch 1, Hatch 2, and Hatch 3 functions geometries in any objects like circular or rectangular. The purpose of hatching is to get more contrasting, deep, and clear markings/engraving into the text, barcodes, circles, logos, and any design patterns.
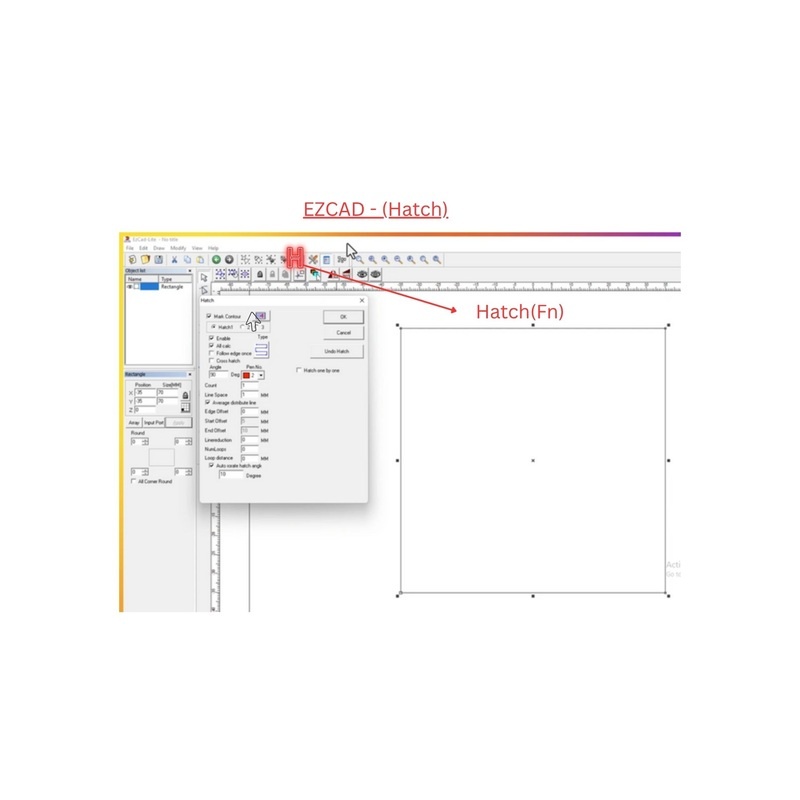
So, we can set the hatching requirements into the EZCAD >(H) function. Now, here we shall be describing step-by-step a thorough idea about how we can do the setting and send the hatching command.
Morever, we also have to check the enable to use the option of all Hatch categories (H1, H2, and H3)
| Application | Recommended Hatch Types | Purpose |
|---|---|---|
| Engraving | (Hatch 1) Cross Hatch, Multi-Angle (0-90°), Contour | For deep & detailed marks & engraving patterns |
| Cleaning | (Hatch2) Cross Hatch, Multi-Angle (0-90°), Contour | Large area, minimal material removal |
| Marking | (Hatch 1,2,3) Unidirectional, Contour, Dot Hatch | Sharp, shallow, high-contrast marks |
Type of Hatch
To get the perfect hatching command, we have to select the type of hatch. Here are the types of hatching:
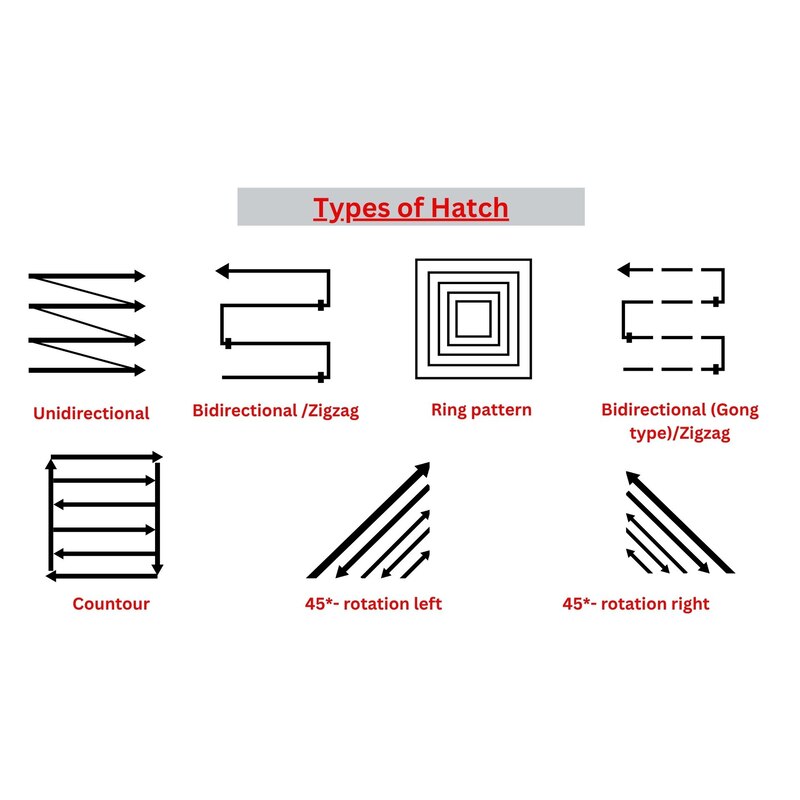
- Unidirectional scanning: A unidirectional hatch pattern appears when the laser beam emission falls in a single direction. And fills the solid marking object with clear lines.
- Bidirectional scanning: In this hatch pattern, the laser beam scans and marks the objects in two ways with its opposite directions.
- Ring pattern scanning: In this hatch type, scanning looks like a ring pattern that fills the object with laser beams from inside to outside and vice versa.
- Bidirectional Gong type: Bidirectional hatching means the laser scans and marks lines in both directions—left to right, then right to left—without lifting or pausing between lines.
- Contour scanning: Contour Scanning is a laser marking mode where the laser follows the exact outline (contour) of shapes, text, or images—instead of filling with hatch lines.
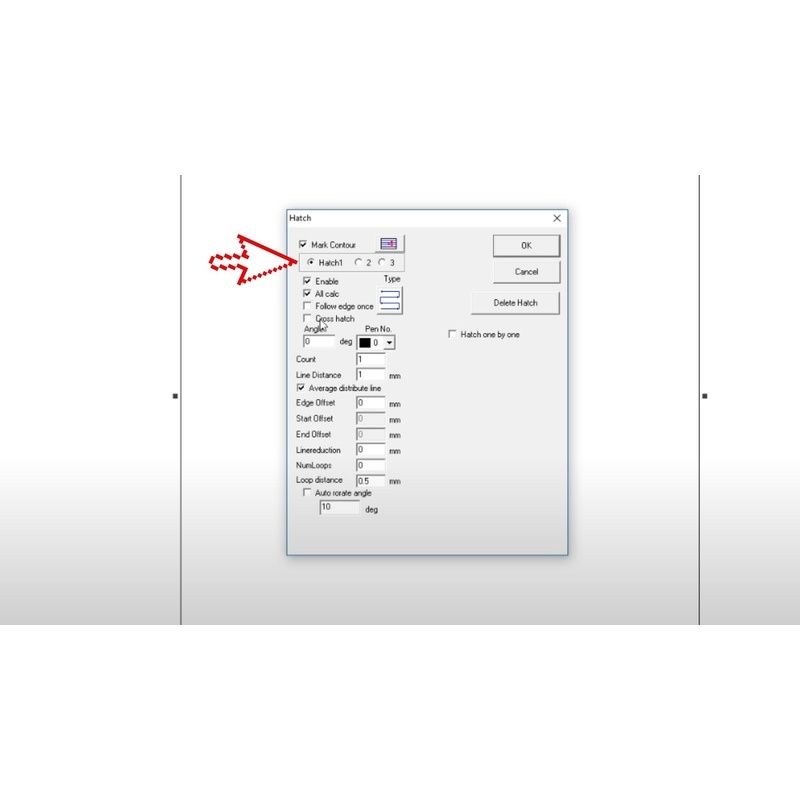
What are the Hatch settings?
Here are all the detailed hatch setting commands we need to set before the final hatching.
Mark contour:
“Mark Contour” fills the outer edges of the object of any shape. It makes the marking and engraving clearer and darker.

Hatch(1, 2, 3)
In EZCAD software’s hatching command, we usually get three layers of hatch1, hatch2, and hatch3 settings to select your marking patterns. So, we get the different directions, angles, and hatching shapes by selecting and enabling them individually at a time. In case you have a requirement of darker and more angled marking/engraving over the different materials like SS, MS, and aluminum, its setting would work accordingly.
Enable
Once we check enable, it activates the current hatch pattern. So give the marking command over the material with the selected hatch patterns.

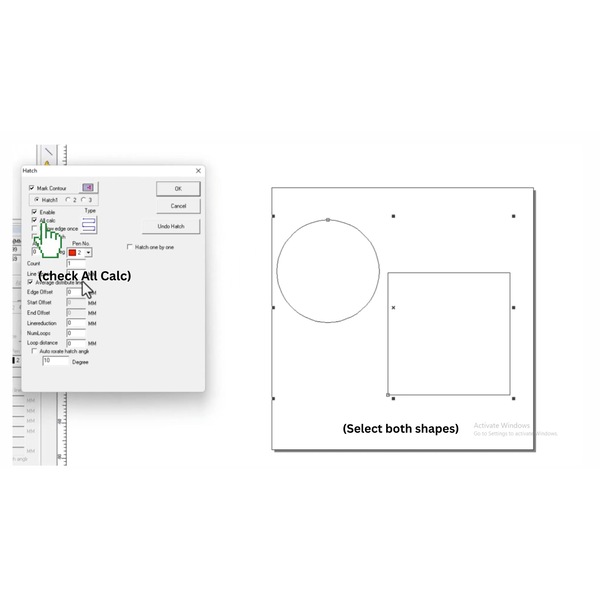
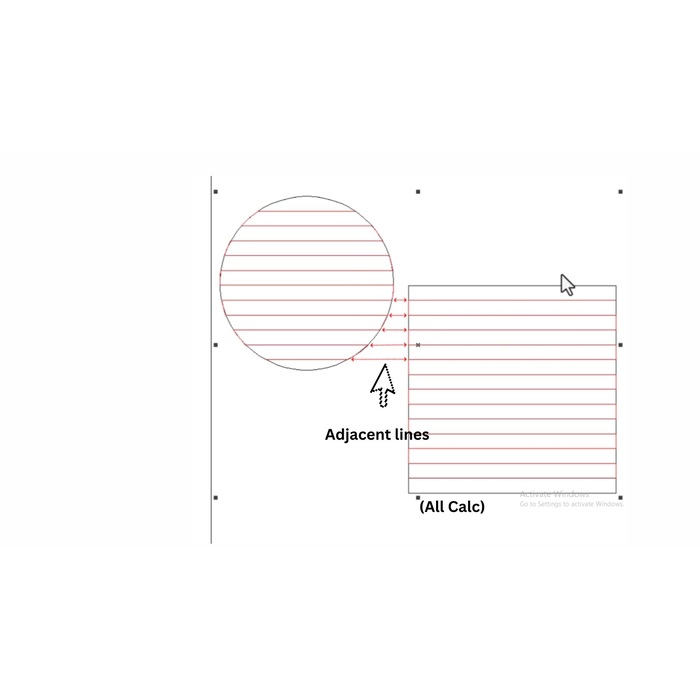
All calc
To mark the two or more different shapes, all calc settings work. This makes a uniform and clear marking with the adjacent lines parallel.
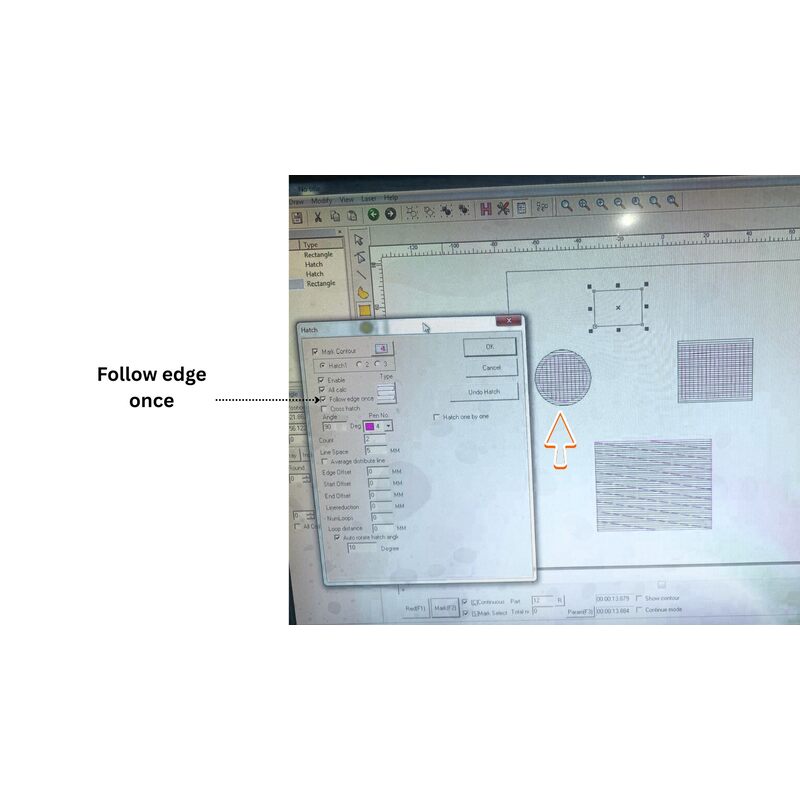
Follow edge once
To make the more accurate and dark marking, we have an option to follow edge one; this creates multiple edges once it is checked. Here we can see in this circular shape that two edges have been created.
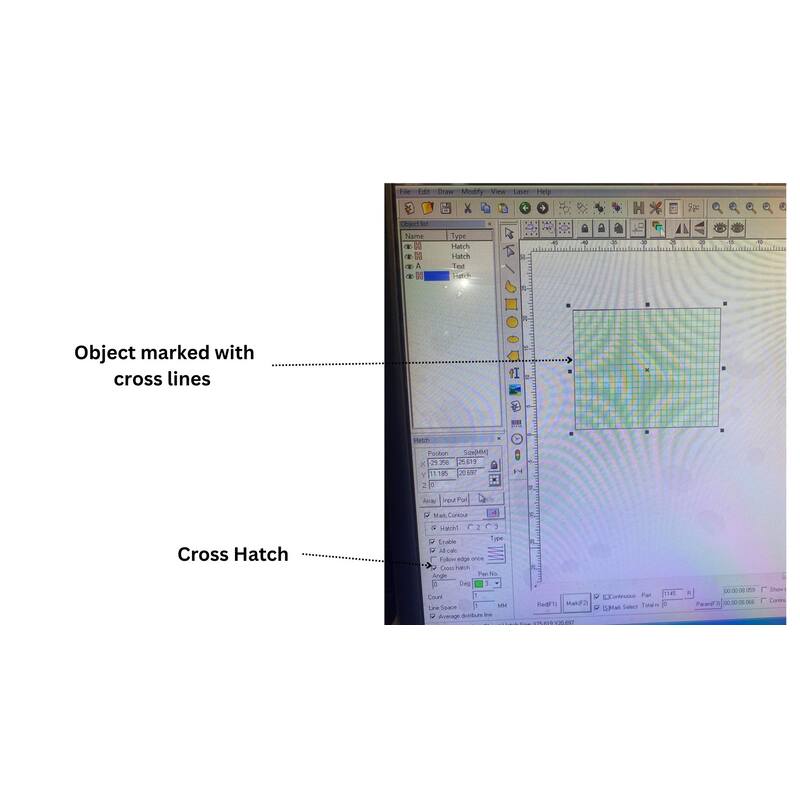
Cross hatch
Cross hatch patterns are applied over the shape inside with the certain selected angle, like 45-90°. This makes the marking patterns more clear and dark and uniform filling. Inside this rectangle-shaped object, we can clearly see the difference of cross hatching
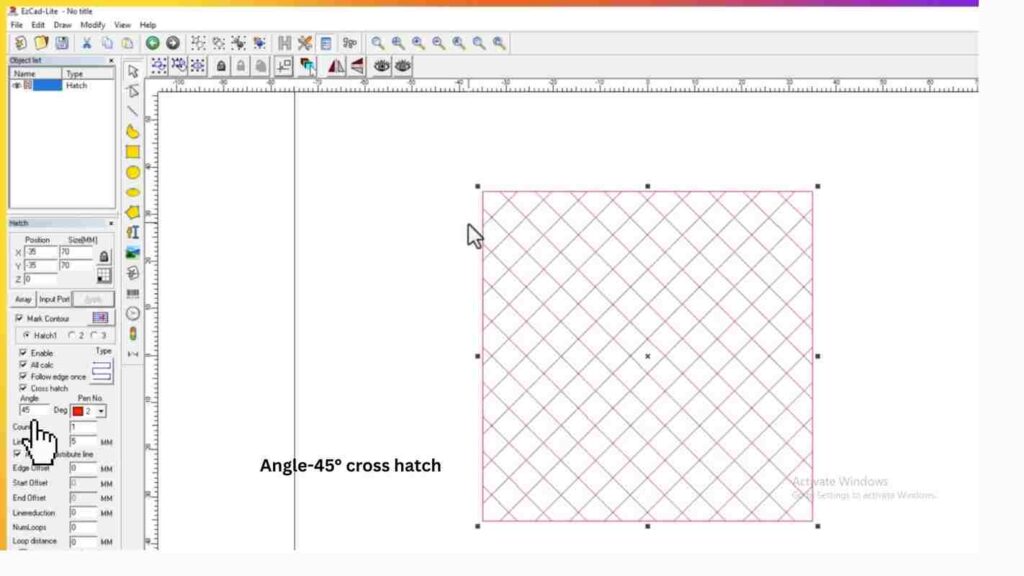
Angle
Angle controls the orientation of fill lines by different angle settings. Here we have selected a 45° angle(multidirectional) with the cross hatch patterns to make the marking.
Pen no.
Pen No includes set of laser parameter settings (like speed, power, and frequency) assigned to an object, layer, or hatch. Also, we can mark the different-shaped text logos and images with pen numbers. And set the colors of pen 1, pen 2, and so on for sharper and more consistent marking patterns.

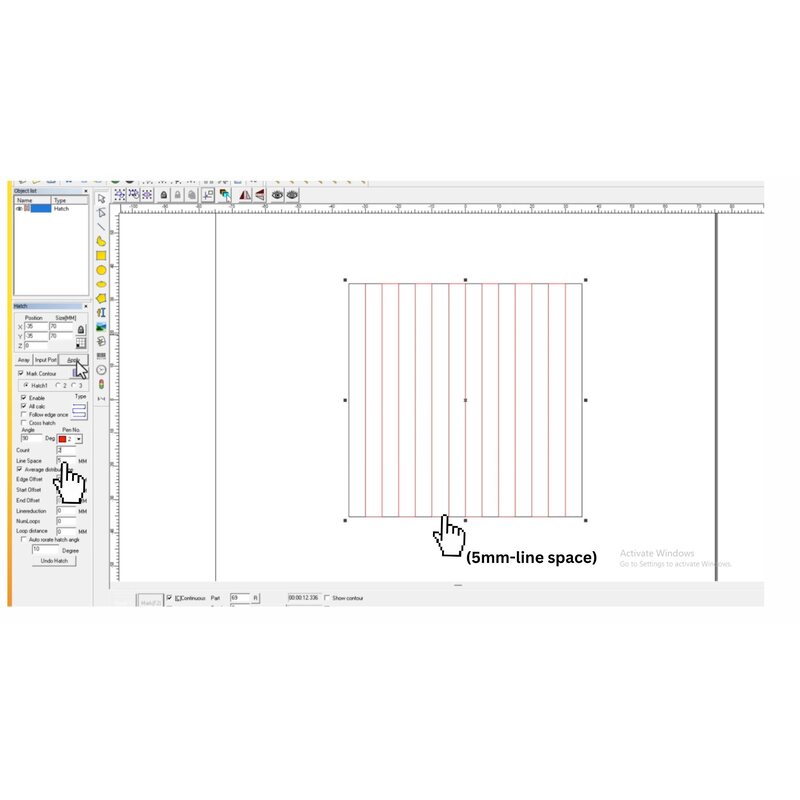
Line space
To get a good hatching effect, Line spacing is checked before the hatching command. In this picture we have set the line spacing to 5 mm, which makes uniform and spacious marking. So, we can set it as per more dense marking requirements.
Average distribute line
Average Distribute Line is a hatching setting that ensures uniform spacing of hatch lines across an selected object, regardless of its shape or size.

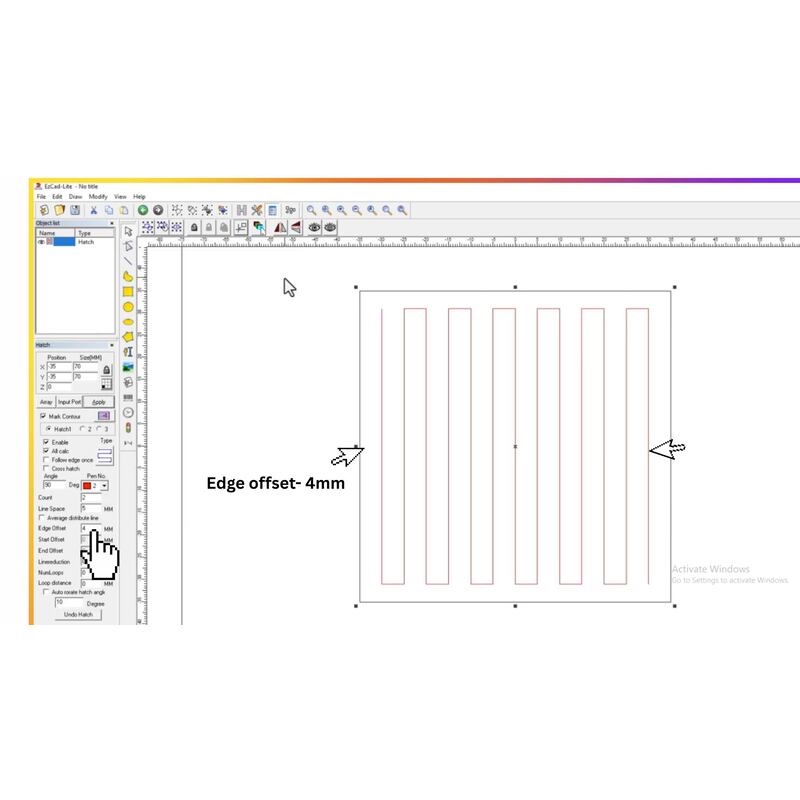
Edge offset
Edge Offset manages the distance between the hatch lines and the edge/contour of the shape or text being marked. Here we have selected an edge offset value of 4 mm that leaves the 4 mm distance from the edges to do the final hatching. Also, we can select the patterns and type with the different angles to get the final hatch.
Start offset and End offset
In this image we have set the start and end offsets at 5 mm and 10 mm accordingly. This marked the shape by leaving the start point at 5 mm and the end point at 10 mm.

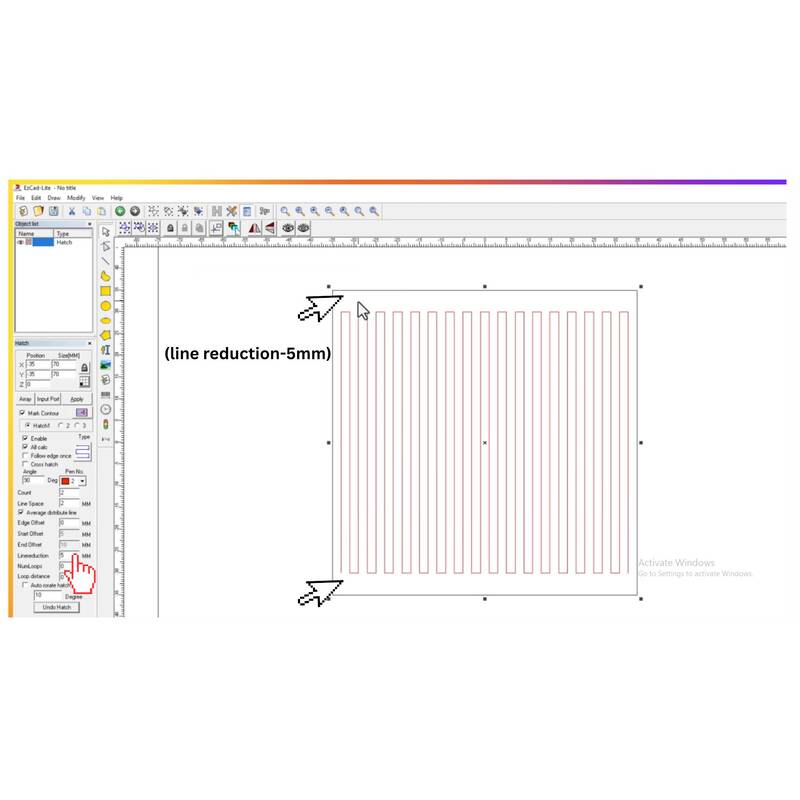
Line reduction
We can select the line reduction at 5mm, and it reduces the line from the edges by 5mm to make the marking over any shape.
Numloops and Loop distance
In laser marking, EZCAD settings, NumLoops and Loop Distance control the number and spacing of repeated hatches. Here we can see after selecting the numloop of 2 and loop distance of 5 mm. We can see this shape has 2 extra loops inside it that are separated by a distance of 5 mm each.

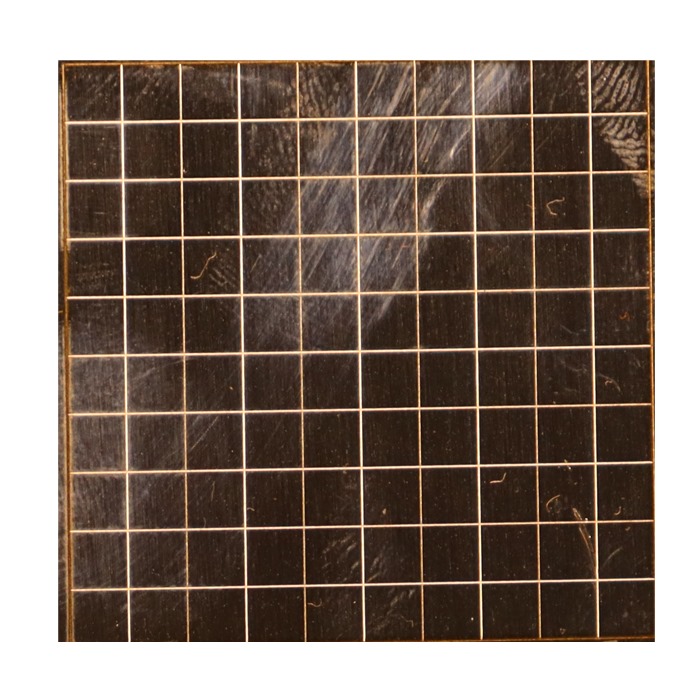
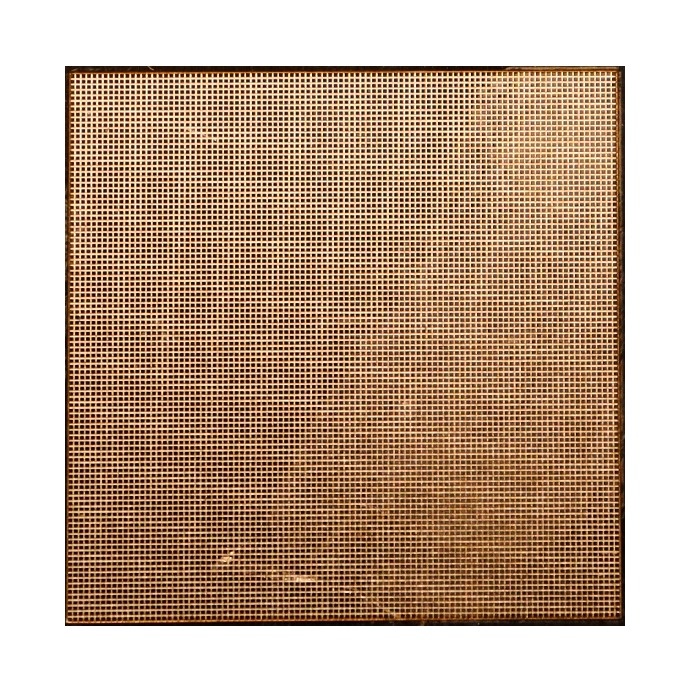
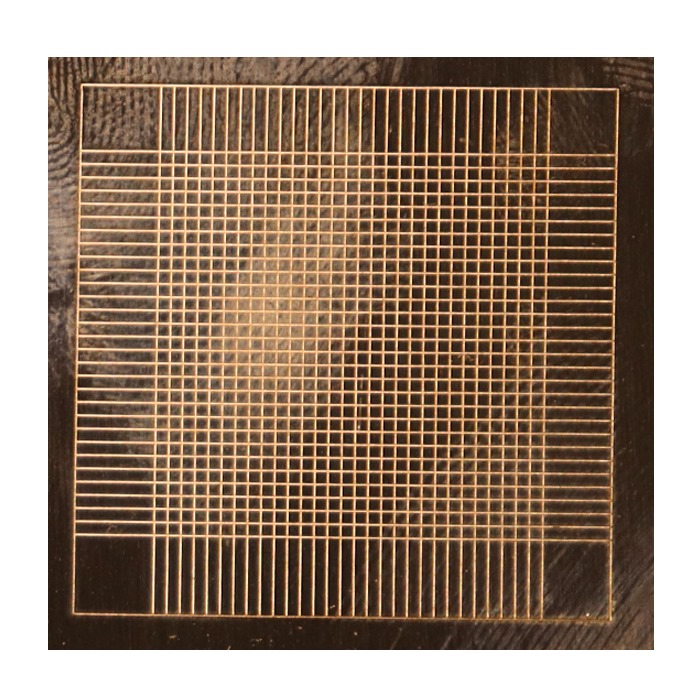
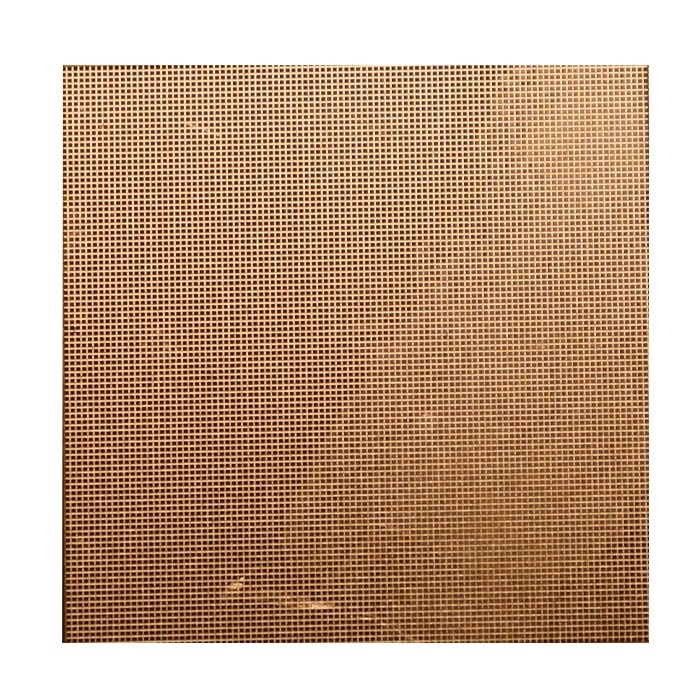
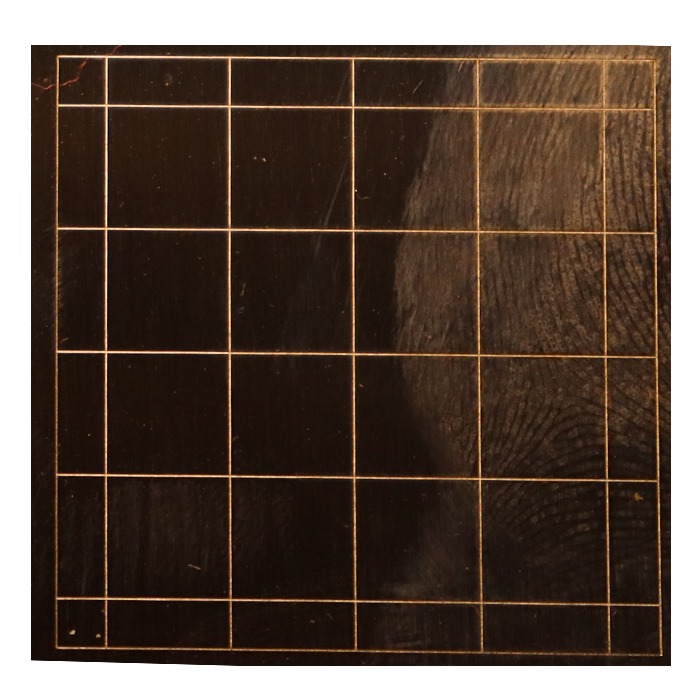
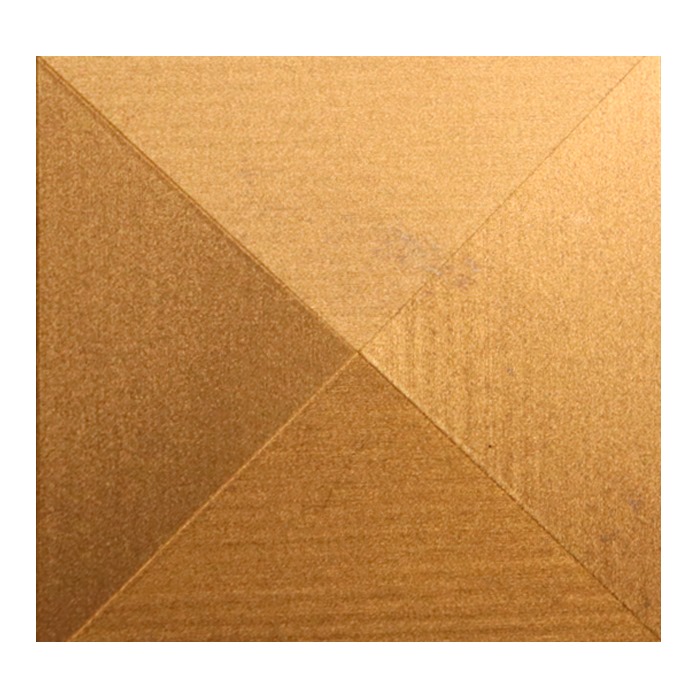
Samples of hatching (SS sheet)
Here are some of the hatch samples that were taken over the SS sheet material.